In general, it's difficult to generate objects based on intersections
of arbitrary geometrical objects. (Of course, getting the
intersections of rectangles are easy.) So, if you want a vector-based
object that represents an intersection of arbitrary objects, tgif won't
be able to do that in general. However, for regularly shaped objects,
such as circles, here is a way to do it if you can choose where to place
them (as in the case where you are creating a Venn Diagram). If you
are interested in generate GIF images only, please see the
Intersections FAQ page.
Thanks to Chris Menzel <cmenzel@tamu.edu> for
showing me how to do this.
Let's first look at intersecting two circles.
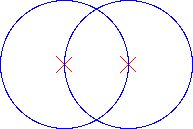
The most important thing to make this work is to overlap the
circles at the right place! Since tgif can draw filled arcs,
if the overlap can be somehow filled by arcs, we can get this right.
The trick is to realize that placing the center of one circle right
on the other circle can make things easy for you!
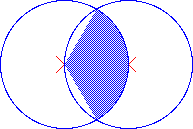
Now, change the fill pattern and draw a wedge, centering at the
center of one circle, starting from one intersecting point and
ending at another (please notice that the original hollow circles
are raised to the top, by selecting Front() from the Arrange Menu,
to produce the clear outlines for the intersection).
Draw another wedge, centering at the other circle,
starting from one intersecting point and ending at another.
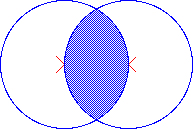
The obj file that produces the above
images is provided here.
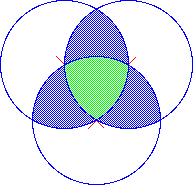
Now, let's first look at intersecting three circles.
Once you know how to create the overlap between two circles,
it's fairly straight-forward to do it for three circles.
The trick is to place the center of one circle right on the other
circle!
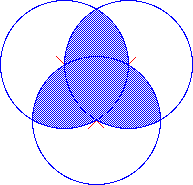
The middle region requires 3 wedges. The 3 ``control points'' of
each wedge are the 3 centers of the circles.
What about the non-interesting part of a circle? It quit simple.
Just draw a pie that's the complement of a wedge and send it to
the back by selecting Back() from the Arrange Menu.
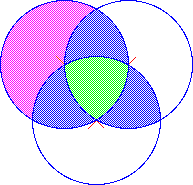
The obj file that produces the above
images is provided here.
Finally, creating an EPS file is easy. Just set print/export format
to EPS from the Print/ExportFormat Submenu of the File Menu and
select Print() from the File Menu.


